Widget Exploration
Living up to my idea of writing more technically focused stuff.
Prefix
My, New Years Resolution was to write and publish one piece a month. (I don't want to call this 'article'; I feel that would imply a certain journalistic standard that I am certainly not following) Now a quick maths exercise tells me that this is month number 10 (Haha, it's actually 11 now). I have 8 pieces written. 8 is less than 10(11). (and also less than 9, which would be the number I should have without this month.) I also wrote multiple pieces in July and none since then. The main reason for this is that I moved to Billund to be an Intern at The LEGO Group. Either way, I have been looking into Widgets, and whilst I think creating them is fun, I also have some questions, and I want to write about them.
Widgets
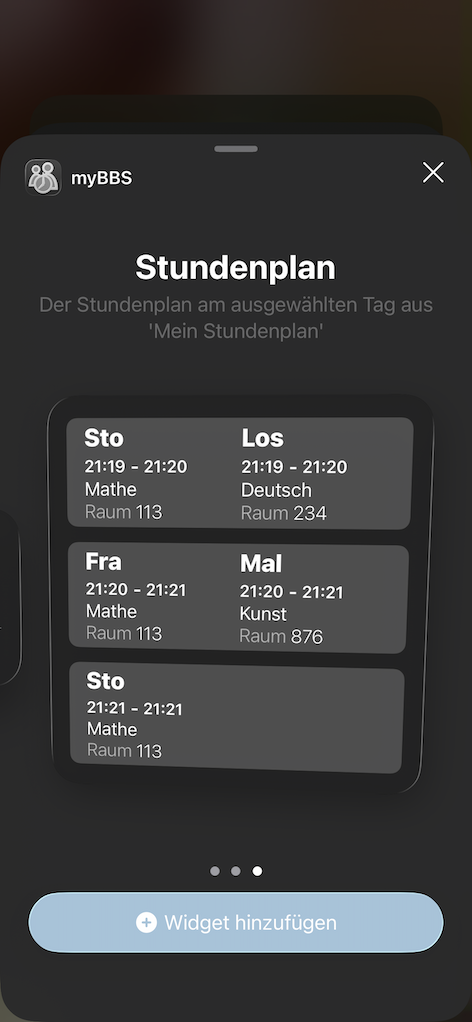
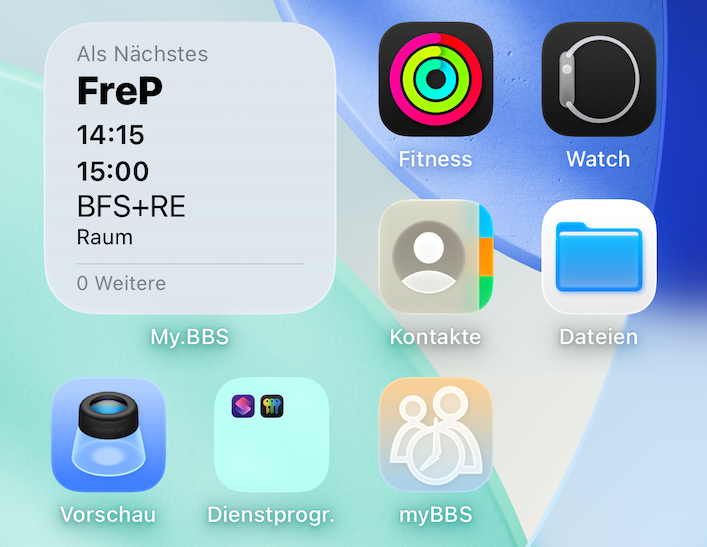
Finally, moving on to Widgets. My vision for my widgets is this: one big one for a lot of information and some smaller ones for less information. You might be right in assuming that this is for my myBBS app. This is about timetables. I don't want to share too much; I just want to talk about some general widget-stuff.
TimelineProvider
So, one widget would have some customisation options; the other would not. I started out with the Xcode template, which uses an 'AppIntentTimelineProvider'. This is quite nice, and thanks to async/await, it is also easy to set up. My network fetch is already using async/await, so it was easy enough.
The way widgets work is that you create a timeline that has all of the widgets and WidgetKit then figures out which widget to display at which time. The timeline is created in the 'timeline()' function.
Apple has a very helpful diagram in their developer documentation; I don't think I can explain it any better.
TimelineEntry
Each Widget in the Timeline is a 'TimelineEntry'. In a simplified view, you might say that a Timeline is a fancy array with the entries as the content.
Basically, TimelineEntries are only structs that keep ahold the information you want to display in the widget. So, it is not that difficult to create one. The only must have is a date property. That date tells WidgetKit when to display the entry.
In my case, I save some information about the content of the lesson, the time and date of the lesson, and how many other lessons there are during the day.
struct TimelineLessonEntry{
    // it looks something like this
    let date: Date
    let lesson: Lesson?
    let moreLessonsAfter: Int
}
In case new Information becomes available and your Timeline needs to change, you can request to reload timelines from other points in your app. (Maybe when you get a remote notification?) The important thing to note here is that you are requesting to reload the timeline. The system might decide not to actually fulfil your request, for instance, if you call it very frequently. There is some sort of daily budget/limit as to how often you can refresh a timeline, but I am not sure which actions count towards that budget. Also, something that tripped me up when working with building from Xcode, it might be that the timelines refresh more often than they can in a release build, or they might not directly update at all, so that changes arent directly visible.
States
At this point, I should probably talk about the different Widget states. (That is what I would call this; maybe there is a better word for this.) Widgets can be shown in different situations. There is, of course, the one when it is showing the view you designed with the information you want to display, but widgets can also be seen when users add them to the home screen. During this time, you might want to show some placeholder information (especially if loading real data takes time). For this, you specify a returning TimelineEntry in the TimelineProviders placeholder() function. As you already have a TimelineEntry Struct, this is easy too.
By the way, if you want to figure out if the widget you're showing is for a preview state, you can check the context. The context offers an isPreview property that will be true if its a preview. (As the name suggests, Captain Obvious)
There is also a relevances() function. I don't use it currently, mainly because I am unsure what I am supposed to do with it. I might use it once I figure that out. This is very much a work in progress.
Now that I created the timeline (really, it's not that difficult), I am moving on to the actual view. (Also yes, I do not have any naming conventions or consistency in my project. I am working on that...)
struct NextLessonWidgetTimelineProvider: AppIntentTimelineProvider {

    func placeholder(in context: Context) -> TimelineLessonEntry {
        TimelineLessonEntry(date: .now, lesson: nil, moreLessonsAfter: 0)
    }

    func snapshot(for configuration: WochentagConfiguration, in context: Context) async -> TimelineLessonEntry {
        return TimelineLessonEntry(date: .now, lesson: nil, moreLessonsAfter: 0)
    }

    func timeline(for configuration: WochentagConfiguration, in context: Context) async -> Timeline<TimelineLessonEntry> {
    // create a timeline and return it
        var entries: [TimelineLessonEntry] = []
        // do some fetching and calculations, leading to allLessons being an array of all lessons during the day
        // the configuration can be an empty struct, so don't worry about that now
        for lesson in allLessons{
            entries.append(TimelineLessonEntry(date: lesson.startTime, lesson: lesson, moreLessonsAfter: 0))
        }
        return Timeline(entries: entries, policy: .atEnd)
    }
}
Environment Values
There are a couple of environment variables which might have an influence on your Widget. There is the widgetRenderingMode, which can tell you in which colour scheme the widget is shown. The possible options are accented, vibrant and fullColor. accented will be used in a tinted homescreen (or on the tinted watch face), vibrant in a monochrome environment (my homescreen, the lock screen, or the watch, for instance), and fullColor for all other cases on the watch and homescreen.
Another thing that might be very helpful when creating the views is the widgetFamily. This will basically tell you which size the widget will have. There are many sizes to choose from, and you can also limit which sizes your widget will be available in. For me, I limit my smaller widget to smaller sizes on the iPhone and block all accessory (watch) sizes, as my view is too big for them. You cannot do that in the view, though; this has to be changed in the body of the Widget. I would assume that you know how to make a SwiftUI view, this is just a basic implementation of what I am doing.
struct NextStundeWidgetView: View {
    @Environment(\.widgetRenderingMode) var renderingMode
    @Environment(\.colorScheme) private var colorScheme

    var entry: NextLessonyWidgetTimelineProvider.Entry

    var body: some View {
        if let stunde = entry.lesson {
            LessonView(lesson: stunde, more: entry.moreLessonsAfter)
                .containerBackground(for: .widget) { // all widgets need to have a background. do not forget this.
                    Color.widgetBackground
                }
        }else{
            NoLessonsView()
                .containerBackground(for: .widget) {
                    Color.widgetBackground
                }
        }
    }
}
Widget
To actually create a Widget, you also have to create a struct that conforms to the Widget protocol. In order to conform to that protocol, your struct must implement a body function, which will return a WidgetConfiguration.
struct NextLessonWidget: Widget {
    let kind: String = "a nice string to uniquely identify your widget when reloading it from inside the app"

    var body: some WidgetConfiguration {
        AppIntentConfiguration(kind: kind,intent: WochentagConfiguration.self, provider: NextLessonyWidgetTimelineProvider()) { entry in
            NextStundeWidgetView(entry: entry)
        }.configurationDisplayName("Stundenplan") // this string will be shown in settings and in the adding screen
            .description("A description that will be shown in the adding screen and in the settings of the widget")
            .supportedFamilies([.systemLarge, .systemExtraLarge]) // there are more here, like for instance .systemSmall, .systemMedium
    }
}
WidgetConfiguration
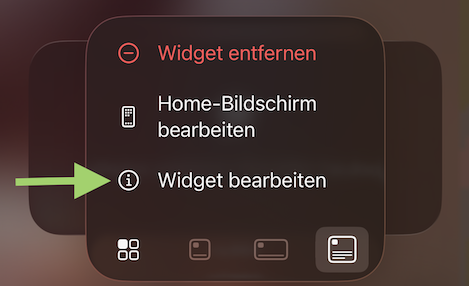
The WidgetConfiguration is one of the things that gives me a lot to think about. One of my widgets has configuration options, the other doesn't. With AppIntentConfiguration, I provide a struct that shows my widget settings. The nice thing is that the widget will create the settings page on its own, based on the values in my configuration. If my configuration contains a boolean, it will automatically show a toggle switch, which I personally find very cool. My settings page will only contain a picker, and that is it.
struct WochentagConfiguration: WidgetConfigurationIntent {
    static var title: LocalizedStringResource { "you have to add a title" }
    static var description: IntentDescription { "I have no idea where this string will be shown" }

    // An example configurable parameter.
    @Parameter(title: "Tag", default: .heute)
    var wochentag: Wochentage // this is just an enum that has the values for the weekdays, as I offer both relative days (today, tomorrow) and weekdays (mon, tue, wed, ...) this could probably be solved easier, at first I only wanted to offer today and tomorrow
}
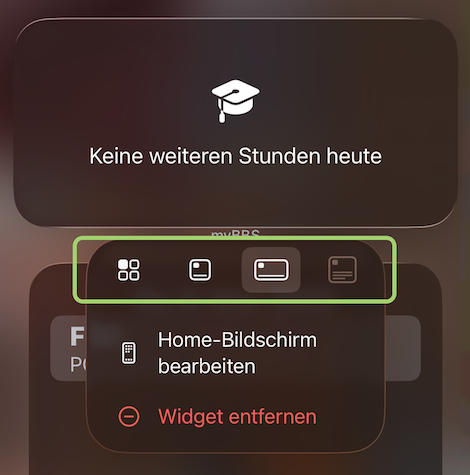
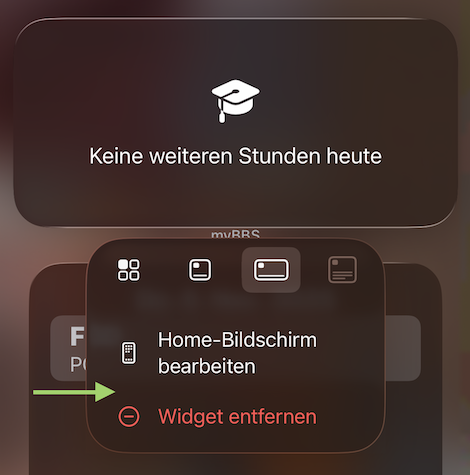
For my other widget, I do not have any settings. But if I use the AppIntentConfiguration (and therefore AppIntentTimelineProvider), my widget will always allow a user to open a 'settings' page for my widget. This page will be empty, so I do not want it to be there at all. To remove the 'settings' option from the widget (visible when long pressing on the widget on the screen), I changed to using StaticConfiguration. This means I have to use TimelineProvider instead of AppIntentTimelineProvider. However, TimelineProvider functions all have a completion handler and do not seem to support async/await. Does this mean I will now be lazy and simply wrap everything in a Task{}? absolutely, it's getting late, and I want to see the widget again.
struct NextLessonStaticWidget: Widget {
    let kind: String = "a nice string to uniquely identify your widget when reloading it from inside the app"

    var body: some WidgetConfiguration {
        StaticConfiguration(kind: kind, provider: NextStundeWidgetProvider()) { entry in
            NextStundeWidgetView(entry: entry)
        }.configurationDisplayName("Nächste Stunde")
        .description("Die nächste Unterrichtsstunde am heutigen Tag aus 'Mein Stundenplan'")
        .supportedFamilies([.systemSmall, .systemMedium])
    }
}

struct NextStundeWidgetProvider: TimelineProvider {
    func placeholder(in context: Context) -> TimelineLessonEntry {}

    func getSnapshot(in context: Context, completion: @escaping @Sendable (TimelineLessonEntry) -> Void) {
        completion(TimelineLessonEntry(date: .now, lesson: nil, moreLessonsAfter: 0))
    }

    func getTimeline(in context: Context, completion: @escaping @Sendable (Timeline<TimelineLessonEntry>) -> Void) {
        // you know what is expected here
    }
}
So I cannot have a widget without settings if I want to use async/await? I haven't really figured this out, but hope that I will when I work on this again.
By the way, that background on the settings page, the 'add Widget' button when editing the homescreen (and the widget, if I hadn't turned my phone into glass mode)? It's a colour you get to set with containerBackground. You can define a WidgetBackgroundColor in the Assets, but unlike accentColor, it's not actually doing anything; you need to call that colour yourself.
.containerBackground(for: .widget) {
    Color.widgetBackground
}
One last thing to make your widgets show up. You need to declare all widgets in the widgetBundle.
@main
struct myBBSWidgetsBundle: WidgetBundle {
    var body: some Widget {
        NextLessonStaticWidget()
        AnotherWidget()
        //aControl()
        //aLiveActivity()
    }
}
Conclusion
These were my Widget adventures. (I am still working on this.) If you know something I blatantly overlooked, please reach out!